The development environment - Example: Thonny
Installing and uploading the firmware
Thonny is
the counterpart to the Arduino IDE under
MicroPython. In Thonny, a program editor
and a terminal as well as other interesting
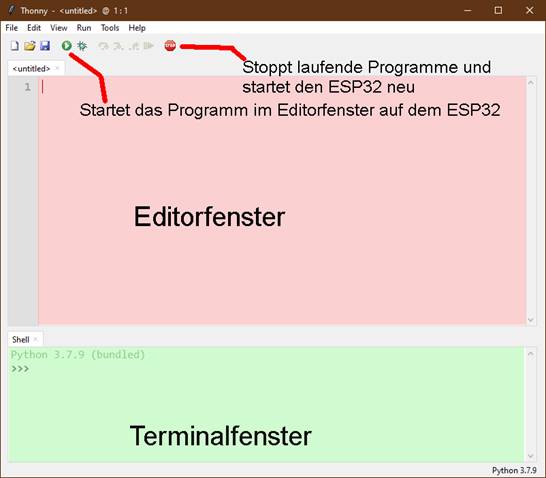
development tools are combined in one interface. You have clear access
to the working directory on
the PC, the file system on the ESP32, your programs in the editor, the terminal
console and, for example, the object inspector in one window.
The Thonny resource is the
thonny-3.3.x.exe file, the latest
version of which can be downloaded directly
from the product page. There you can also get
an initial overview of the properties of the program
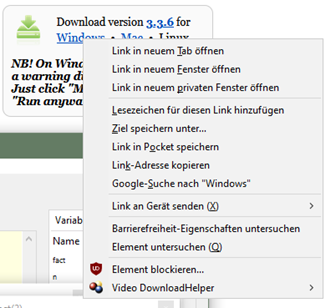
Right-click on Windows and save target
as to download the file to any
directory of your choice. Alternatively, you can also follow this direct link.
In
addition to the IDE itself, Thonny's bundle also includes Python
3.7 for Windows and esptool.py. Python 3.7 (or
higher) is the basis for Thonny and
esptool.py. Both programs are
written in Python and therefore
require the Python runtime environment. esptool.py
is also used in the Arduino IDE as a tool to transfer software to the ESP32 (and other controllers).
Now
start installing Thonny by double-clicking on your downloaded file if you
only want to use the software
for yourself. If Thonny
& Co. is to be available to all users
on your computer, you must run the exe file as
an administrator. In this
case, right-click on the file entry in Explorer and select Run as administrator.
It is very likely
that Windows Defender (or your anti-virus software) will respond. Click on more information and in the window that opens
click Run anyway.
Now simply follow the user guidance with
Next.
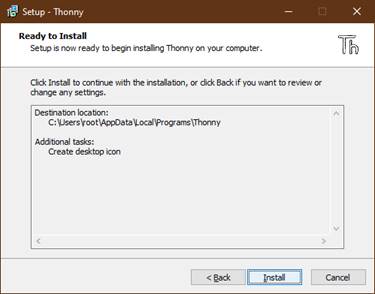
Clicking on Install starts the installation
process.
On first launch, specify the language, then the editor window will appear along with the terminal area.
Flashing the Firmware
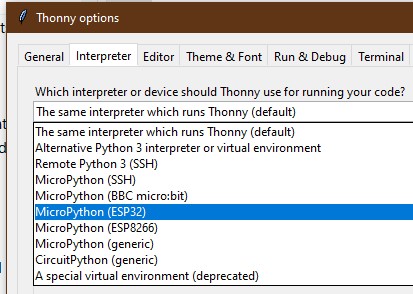
Set the controller type used as the first action. With Run – Select Interpreter … you end up in the options. Please set Micropython (ESP32) or (ESP8266) depending on the controller type.
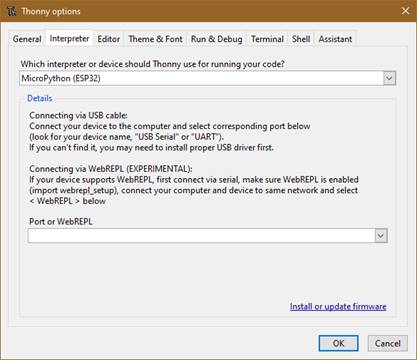
Now download the firmware Micropython for the ESP32 or for the ESP8266 from the selection page and save this file in a directory of your choice. The bin file must first be transferred to the ESP32 /ESP8266. This also happens with Thonny. Call again with Run – Select Interpreter … Thonny Options. At the bottom right click on Install or update Firmware.
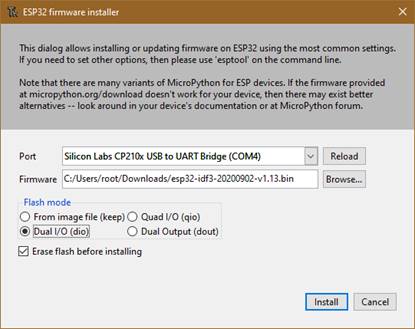
Select the serial
port to the ESP32 / ESP8266
and the downloaded firmware file. With Install you start the process,
which usually runs automatically.
The ESP8266-01 is an exception. There is no automatic flash function on the small board. This means that the two-part process of deleting the flash memory and writing a new one must be controlled via logic levels at the GPIO0 and Reset/EN connections according to the following pattern.
a) Complete the
preparations in Thonny as described above
b) Press reset and flash button
c) Start the flash
process in Thonny
d) Release reset button, hold flash button until progress
is shown
e) Release flash button
f) Wait until
access to the COM interface
is reported again
g) Then go
through points b) to f) again and
h) finally close
the installer window and exit the options with
OK
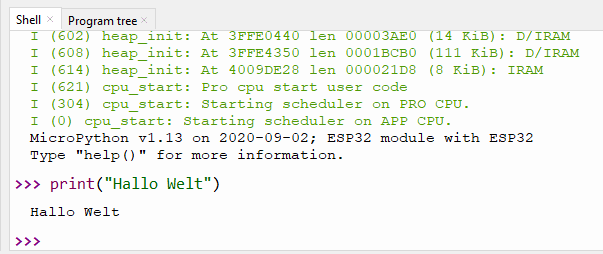
After a short time, the MicroPython firmware is on the controller
and you can send the first commands
to the controller via REPL,
the MicroPython command line. For example, enter the following
command in the terminal window.
print("Hello World")
Unlike in the Arduino IDE, you can send individual commands to the ESP32 and it will respond obediently if they are MicroPython instructions. If, on the other hand, you send a text that the MicroPython interpreter cannot understand, it will draw your attention to this with an error message.
>>> print"hallo nochmal"
SyntaxError: invalid syntax
Traceback (most recent call last):
File "<stdin>",
line 1
SyntaxError: invalid syntax
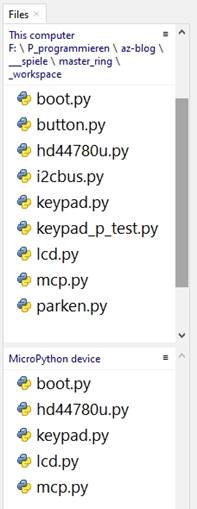
To work, however, the overview of the workspace and the device directory is still missing. The workspace is a directory on the PC that contains all the files that are important for a project. In Thonny, his name is This Computer. The Device Directory is the counterpart on the ESP32. In Thonny it is called MicroPython device. You report it as follows.
Click View and then click Files.
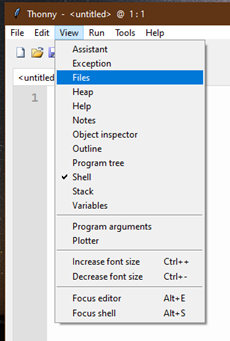
Both areas are now displayed, the workspace at the top and the device directory at the bottom. You can display additional tools via the View menu.

We enter
our programs in the editor area.
For a new program, open an editor window by
clicking on the New button or by
pressing Ctrl+N.
In the Arduino IDE, libraries are recompiled
each time the program is compiled
and integrated into the program text.
In MicroPython you only have to upload finished modules, they correspond to the libraries of the Arduino IDE, to the flash of the ESP32 once at the beginning.
I'll show that with an example.
In Explorer, create a project folder in any directory on your computer. In this directory create a folder called workspace. All further actions start in this directory and all programs
and program parts will live
there.
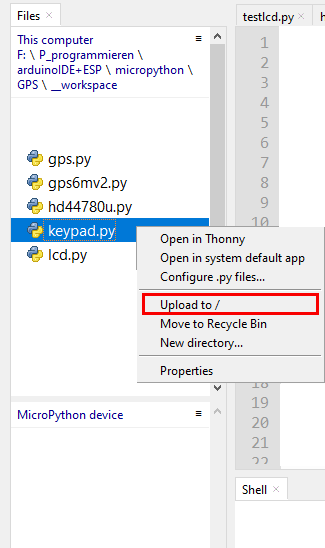
For example, the KEYPAD class is required in the project. The text for this is in the keypad.py file. It is best to load all the necessary modules into your workspace right away. Now, if you haven't already, start Thonny and navigate to your working directory in the "This Computer" window. The downloaded files should now appear in the workspace. Right-clicking opens the context menu, and clicking on Upload to / starts the process.
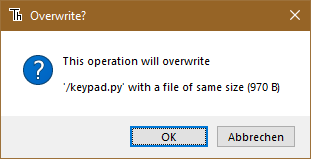
If you have changed something in a module, this, but only this, must be uploaded again. Then answer the security prompt for overwriting with OK.
After uploading the first 4 modules, it looks like this, for example. The file boot.py in the device directory is created automatically when flashing the firmware. Finally, when everything has been tested, we will copy the content of our program into this file. After that, the ESP32 will run the program autonomously each time it is started. A connection to the PC is then no longer necessary.